How do I build a chronological life timeline? Prompts, photos and legacy preservation
A practical guide to building a chronological life timeline with prompts, photos, family stories, privacy checks and long-term legacy preservation.

To build a chronological life timeline, begin with verified dates, arrange memories by life stage, attach photographs and documents to each period, then invite relatives to add missing context before you preserve the finished story. The aim is not to record every event; it is to create a clear family history that shows how childhood, relationships, work, places, values, turning points and legacy fit together.
A good chronological timeline helps a family see the full shape of a life. It gives children and grandchildren more than isolated anecdotes, and it gives mourners a practical way to connect stories, photos and life history in one respectful sequence. For many families, the hardest part is knowing where to start, especially when memories are scattered across albums, phones, letters, voice notes, funeral booklets and different relatives' recollections.
This article explains how to build a chronological life timeline with prompts, photos and legacy preservation in a way that works for readers in Australia, the United Kingdom and the United States. It uses UK English throughout, because the topic is international and family-preservation focused rather than tied to one country's law or funeral practice.
build a chronological life timeline: practical guidance
A chronological life timeline is a life history arranged in date order, usually by year, decade or life stage. It may begin with birth and early family background, then move through childhood, education, work, relationships, home life, community, major challenges, achievements, later years and remembrance. The structure is simple, but the editorial judgement matters: choose events that reveal character, relationships, places and change over time.
The strongest timelines combine facts with lived texture. Birth dates, addresses and school years matter, but a timeline becomes meaningful when it also records the kitchen where everyone gathered, the first job that shaped a work ethic, the journey across a border, the song played at a wedding, the business someone built, the garden they tended, or the sayings family members still repeat.
If you are starting after a death, work gently. Begin with the facts that are least disputed, then add memories in layers. Evaheld Memorials has related family history preservation prompts for families who want a broader way to save stories before they are lost. If the person is still living, ask permission before recording, explain how the timeline may be shared, and let them skip topics they do not want to revisit.
Authoritative archive guidance supports this layered approach. The Library of Congress personal archiving guidance treats family memories as digital materials that need active preservation, while the US National Archives family archives guidance emphasises preventing damage to family papers and photographs before deterioration makes later work harder.
Start with a simple life-stage framework
Before searching through boxes or asking relatives for stories, create a skeleton timeline. Use the headings childhood, teens, early adulthood, relationships, parenting or mentoring, work, moves, community, later life and remembrance. If a person's life does not fit those headings, change them. The framework should serve the life, not force it into a formula.
For each life stage, record what you know in short entries: approximate year, place, people involved, source and confidence level. A source might be a birth certificate, a labelled photograph, a funeral order of service, a diary, a school record, a passport stamp, a letter, an audio recording or a relative's memory. Mark uncertain dates as approximate instead of pretending they are exact.
If you are recording the person's own memories, the Oral History Association best practices are useful because they stress preparation, interviewing, preservation and access. For a family project, that means planning the purpose of the interview, making recording comfortable, saving the file properly and deciding who should be allowed to hear or read it later.
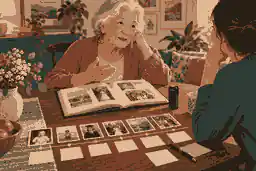
For a living relative, avoid beginning with large questions such as “Tell me your life story.” Start with a small scene: the street they grew up on, the first room they remember, the walk to school, the person who made them feel safe, the first time they earned money. If you need a fuller interviewing method, Evaheld Memorials also covers how to record your life story before its lost forever with prompts, audio, video and consent.
Use prompts that unlock specific memories
Prompts work best when they are concrete. Instead of asking “What was childhood like?”, ask “What did the house smell like after dinner?” or “Which adult did everyone listen to?” Instead of “What was work like?”, ask “What was your first pay packet spent on?” Specific prompts create images, feelings and details that help the timeline become readable.
StoryCorps, which has spent decades encouraging recorded conversations, offers great questions for family interviews grouped by life area. Use that idea, but adapt questions to the person's age, culture, privacy and health. One or two well-chosen questions per session are often better than a long checklist that exhausts the narrator.
Here is a practical prompt sequence for each stage: What was happening in the world or family at that time? Where were you living? Who was closest to you? What changed? What did you learn? Which photograph, object, recipe, letter or song belongs with this memory? What would future family members misunderstand if we left this out?
For grandparents and older relatives, prompts should include family lineage, but they should not reduce the person to genealogy. Ask about their own grandparents, their parents, migration, language, faith or traditions, but also ask about ordinary life: chores, jokes, clothing, school, transport, neighbours, games, illness, money, pride and regret. Evaheld Memorials has a dedicated anchor for grandparent family history interview questions with photos and legacy preservation when the timeline begins with an older family member.
Organise photos before you digitise everything
Do not scan every photograph immediately. First, sort photographs into broad piles by decade, person, household or event. Remove duplicates only after you have checked whether the back of one copy carries a date, handwriting, studio mark or location. Keep uncertain images in a “to identify” group and ask relatives to help while they still can.
The US National Archives digitising guidance advises families to keep originals after digitising because digital files can also be lost. That point is essential for life timelines: the scan lets the family share and annotate the image, but the original remains evidence and often carries physical clues.
Handle originals carefully. The National Archives handling advice recommends clean workspaces and careful handling, including gloves for photographs and negatives because fingerprints can permanently stain them. For fragile paper, avoid automatic feed scanners; they can tear weak documents. The National Archives of Australia paper-file preservation advice similarly warns against pressure, poor handling and unsuitable copying methods.
When a family has many unidentified images, assign each file a temporary identifier and record who supplied it. Evaheld Memorials' collect historical pictures from family with prompts and photo consent workflow can help relatives contribute without turning the project into a disorganised inbox. For especially old or damaged material, use upload old historical photos safely with family prompts and consent notes as a reminder to separate preservation, editing and sharing decisions.
Build the timeline entry by entry
Each timeline entry should be short enough to scan and rich enough to matter. A useful entry might read: “1958, Leeds: Started work as an apprentice printer. He later said the smell of ink stayed with him for life, and the job taught him precision.” Another might say: “1974, Melbourne: Bought the first family home. The garden became the centre of birthdays, barbecues and long Sunday conversations.”
Use one entry per event, not one paragraph per decade. For each entry, add the date, place, people, story, source and media. If an event is sensitive, decide whether the public version should be edited, private or omitted. The aim is faithful remembrance, not exposure.
Digital-photo preservation has its own discipline. The Library of Congress digital photograph advice recommends descriptive file names, tags and multiple copies in different places. For audio memories, the Library of Congress digital audio advice recommends selecting valuable recordings, keeping metadata and saving copies in more than one location.
Families who want the finished chronology to sit within a tribute can connect it to an online memorial. Evaheld Memorials explains creating an online memorial site with photos and stories, including how images, memories and family contributions can sit together rather than being left in disconnected folders.
Verify dates without flattening the story
A family timeline is strongest when it distinguishes fact, memory and interpretation. A birth certificate may confirm a date; a relative may remember the weather, mood or family reaction. Both can be valuable, but they are different kinds of evidence.
If two relatives remember an event differently, record the difference respectfully. Avoid making one person the sole authority unless there is clear documentation. Memory changes over time, and family stories are often shaped by grief, pride, silence, migration, trauma or humour. The Oral History Association principles frame oral history as a collaborative and ethical practice, which is a useful standard even for private family work.
Verification can also protect against accidental harm. Check names, dates, medical claims, service records, immigration details and relationship histories before publishing them widely. If a story affects living people, consider whether consent is needed. In Australia, the OAIC guidance on photos and videos explains that identifiable photos and videos can be personal information in relevant contexts. In the UK, the ICO data-sharing guidance is a reminder that sharing personal information requires care, purpose and accountability.
Choose what belongs in the public version
Not every memory belongs in the same version of the timeline. Create three layers: public, family-only and private archive. Public entries might include life milestones, photographs approved for sharing and the person's values. Family-only entries might include more personal memories, voice recordings and relatives' contributions. Private archive material might include medical documents, unresolved family conflict, private addresses, financial papers or sensitive childhood details.
Evaheld Memorials has practical guidance on digital memory preservation steps, including how families can think about photos, posts, videos and messages before they disappear into old devices or inaccessible accounts. If your timeline will become part of a memorial, check what information helps you start a memorial before gathering everything at once.
Privacy also differs by country. In Australia, federal privacy law often focuses on organisations and agencies, while personal family sharing may fall outside the Privacy Act but still raise ethical and state-law issues. In the United Kingdom, UK GDPR and the Data Protection Act can matter when organisations process personal data, while private domestic use is treated differently. In the United States, privacy, publicity and recording rules vary by state, and copyright in photographs or letters may sit with the photographer or author rather than the person shown. This article is editorial guidance, not legal advice; use consent and restraint where the material affects living people.
Invite relatives without losing control of the timeline
Family collaboration is helpful because no single person holds every memory. One cousin may know the school years, another may have wedding photographs, and an aunt may remember the story behind a house move. Collaboration also reduces the risk of one narrow version becoming the permanent family account.
Set a clear contribution method. Ask relatives to provide a date or approximate date, the people shown, the place, what they remember, whether the image can be shared publicly, and whether their name can appear as contributor. If they are unsure, keep the item private until reviewed. Evaheld Memorials' guidance on inviting family and friends to help build the memorial is relevant when the timeline is being shaped by more than one person.
Use moderation for guest memories, especially soon after a death. Most contributions will be loving, but grief can also bring repetition, factual errors or accidental disclosure. Keep the first published version calm and editable. A good timeline is never truly finished; it can grow as relatives find letters, scan albums or remember details.
Learn from notable life timelines
Public biographies show why chronology matters. A timeline of Maya Angelou would lose meaning if it treated poetry, activism, childhood hardship, performance and public wisdom as disconnected facts. Her life story needs sequence because each chapter helps explain the next.
The same is true for Steve Irwin, whose childhood around wildlife, family work, television presence and conservation legacy form a recognisable arc only when arranged through time. A family timeline does not need fame to deserve that care; ordinary lives also have turning points, lessons and influence.
For Audrey Hepburn, a chronological approach helps connect early wartime experience, performance, public identity and later humanitarian work. These examples matter because they show that legacy is not just a list of achievements. It is the relationship between events, choices, people and values across a lifetime.
Preserve the finished timeline for the long term
When the timeline is ready, export or save it in more than one form. Keep a working digital copy, a shareable PDF or webpage, an archive folder of original files, and a simple index that explains file names and sources. The National Archives of Australia digitisation standards are written for institutional work, but the principle is useful at home: master files and access copies serve different purposes.
For physical storage, use stable boxes, avoid damp spaces and keep photographs away from heat, light and poor adhesives. The US National Archives storage advice for family papers and photographs explains why temperature, storage enclosures and separation from damaging materials matter. For copyright, the US Copyright Office copyright basics are a useful reminder that owning a print or digital copy is not always the same as owning the right to republish it.
If you are publishing the timeline as part of a memorial, decide whether it should be public immediately or kept private until relatives have reviewed it. Evaheld Memorials explains whether a memorial stays private until you are ready to share, which is often important while a family is still gathering facts and approving photographs.
A practical checklist for building the timeline
First, write the life-stage skeleton. Second, add verified dates and approximate dates. Third, sort photographs and documents before scanning. Fourth, interview living relatives in short sessions using specific prompts. Fifth, attach photos, audio and documents to the relevant entry. Sixth, mark sources and uncertainty. Seventh, separate public, family-only and private material. Eighth, invite relatives to contribute with clear consent choices. Ninth, edit for clarity and kindness. Tenth, preserve originals, backups and the final timeline in more than one place.
Common mistakes include scanning without naming files, publishing sensitive stories too quickly, relying on one person's memory, forcing the life into a neat hero narrative, ignoring ordinary domestic details, and treating the timeline as finished after the funeral. A better approach is slower, more accurate and more compassionate.
When the timeline is ready to become part of a shared tribute, Evaheld Memorials can help families build a chronological life timeline in a memorial space where stories, photographs and contributions can continue to grow.

Frequently asked questions
How do I build a chronological life timeline? Prompts, photos and legacy preservation
Start with a life-stage outline, add verified dates, attach photos and documents, then invite relatives to fill gaps before publishing. A memorial timeline works best when family history preservation prompts are combined with careful archiving practices such as the Library of Congress personal archiving guidance.
What is the best first step if I have boxes of unsorted photos?
Sort photos into broad groups before scanning: decade, household, person, place or event. Then use collect historical pictures from family with prompts and photo consent to identify people and permissions, while following National Archives handling advice for fragile originals.
How many questions should I ask in one interview?
Ask fewer questions and leave more space. One or two strong prompts can produce better memories than a long list, especially when paired with record your life story before its lost forever planning and the Oral History Association best practices.
Should a life timeline include difficult memories?
It can, but only with care, consent and clear privacy boundaries. Place sensitive material in a private or family-only layer, and use whether a memorial stays private until you are ready to share alongside privacy principles such as the ICO data-sharing guidance.
How do I date a photo when nobody knows the exact year?
Use clues such as clothing, cars, addresses, handwriting, buildings, school uniforms, studio marks and known ages, then label the date as approximate. You can preserve the uncertainty through upload old historical photos safely with family prompts and consent notes while following US National Archives digitising guidance.
Can relatives add their own memories later?
Yes, and later contributions often improve the timeline. Set clear rules for names, dates, captions and permissions, then use inviting family and friends to help build the memorial with preservation habits from the Library of Congress digital photograph advice.
What file names should I use for timeline photos and recordings?
Use simple descriptive names with dates, places and identifiers, such as 1968-manchester-wedding-mary-john-001. This supports digital memory preservation steps and reflects the file-management approach in the Library of Congress digital audio advice.
How do Australian, UK and US privacy issues differ?
Australia, the UK and the US treat privacy and data sharing differently, but families should ask permission before publishing identifiable images or sensitive details. Start with what information helps you start a memorial and, for Australia, note the OAIC guidance on photos and videos.
How do I keep the original photos safe after scanning?
Keep originals in cool, dry, stable storage, away from poor adhesives, damp, heat and direct light. A digital memorial can use creating an online memorial site with photos and stories, while the originals follow US National Archives storage advice for family papers and photographs.
What should I do when relatives disagree about a date or event?
Record the disagreement calmly, identify each source and avoid presenting uncertain memory as settled fact. Collaborative timelines work best when grandparent family history interview questions with photos and legacy preservation are guided by ethical standards such as the Oral History Association principles.